Crispy Fried Chicken Sandwiches: Your New Weekend Obsession
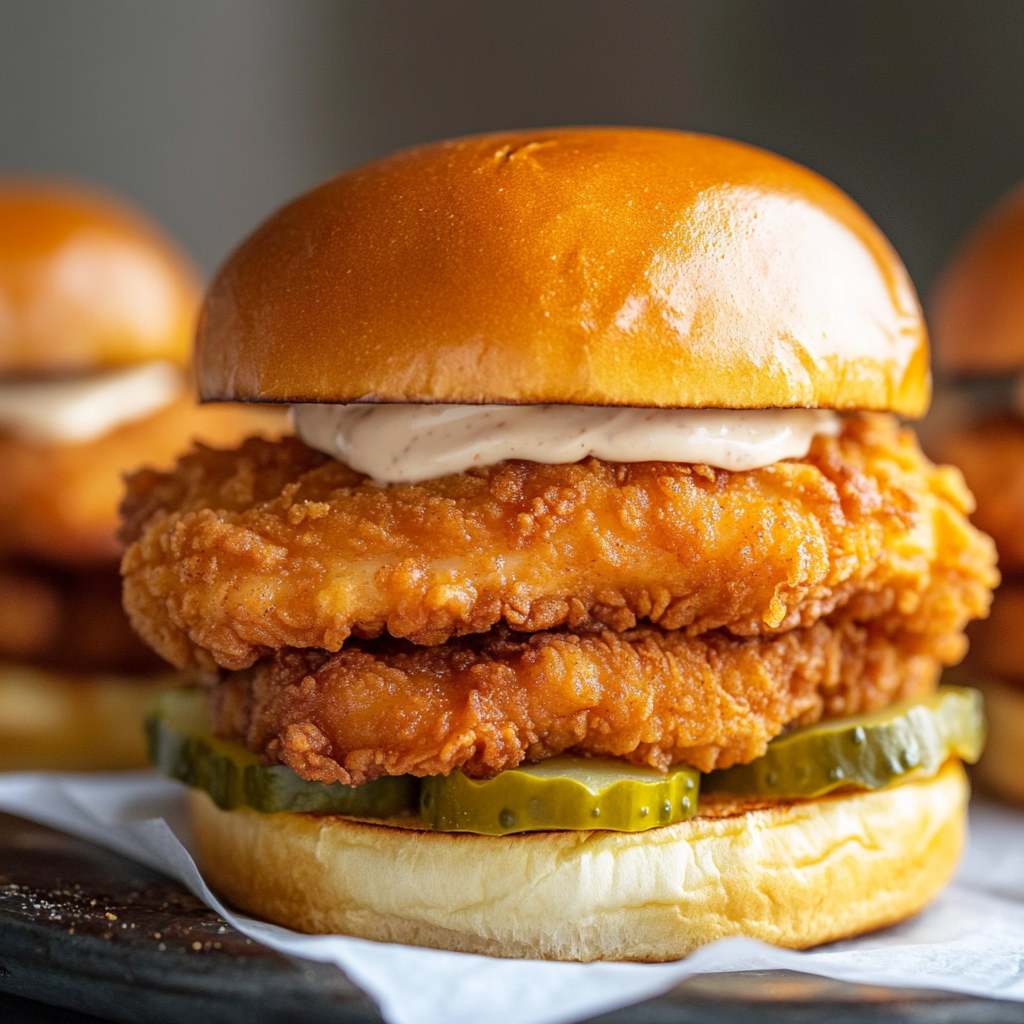
Hey, kitchen pals! Harper here, waving my trusty wooden spoon from my sunlit corner where magic (and maybe a little flour) happens. Ever have one of those meals that turns a regular afternoon into a full-blown celebration? That’s exactly what these Crispy Fried Chicken Sandwiches do. Picture this: impossibly crunchy, golden-brown chicken that shatters with every bite, giving way to juicy, perfectly seasoned meat. Nestled in a soft bun, slathered with a tangy-sweet sauce, and topped with those irresistible bread-and-butter pickles for a pop of brightness. It’s pure, unapologetic comfort food that makes you close your eyes and sigh, “Oh yes.”
I first whipped these up for a rowdy backyard cookout last summer – friends, fairy lights, and the scent of sizzling oil hanging in the air. Let me tell you, these sandwiches vanished faster than ice cream on a hot sidewalk! They’re not just food; they’re a mood lifter, a crowd-uniter, the star player of any casual gathering. And the best part? They’re totally doable in your home kitchen, no fancy equipment needed. Whether you’re a weeknight warrior or a weekend brunch hero, this recipe’s got your back. So tie on that apron, crank up your favorite tunes, and let’s make some crispy magic together. Your taste buds are about to throw a party! 🎉
That One Cookout Where the Chicken Stole the Show
Okay, story time! Remember my friend Leo? Total grill master, swears by his brisket. Last Fourth of July, he hosted a cookout and begged me to bring “something fun.” Challenge accepted! I decided to test these fried chicken sandwiches live for the first time. Picture me: juggling a Dutch oven of hot oil on a picnic table, flour dusting my denim shorts, and my hair escaping its messy bun. Chaos? Absolutely. Worth it? Oh, honey.
As soon as the first batch hit the oil, that glorious sizzle drew a crowd. The smell – that intoxicating mix of pepper, garlic, and crispy goodness – had people abandoning the grill line. Leo’s brisket? Temporarily forgotten. The moment those golden beauties landed on buns, it was a feeding frenzy. My pal Maya took one bite, clutched my arm, and whispered, “Harper, what IS this sorcery?” with pickle juice on her chin. We spent the rest of the evening passing sandwiches around, fingers greasy, laughing under the string lights. That’s the power of a truly great fried chicken sandwich – it doesn’t just feed you; it creates a delicious, crumby, joyful memory. ✨
Gathering Your Crispy Chicken Dream Team
Here’s your grocery list for sandwich greatness! Pro tip: Mise en place (a.k.a. getting everything prepped and measured) is KEY for stress-free frying. Let’s break it down:
For the Chicken:
- 3 boneless, skinless chicken breasts (about 1⅓ lbs): Look for plump, even-sized breasts. Halve them horizontally (“butterfly” style) if they’re super thick for even cooking and perfect sandwich fit! Sub: Chicken thighs (boneless/skinless) for extra juicy richness.
- 2 cups cold water + 2 tbsp + ¾ tsp salt + 2 tsp sugar: This simple brine is the SECRET to unbelievably juicy chicken! The salt seasons deep, sugar balances. Must use cold water!
- 4–6 cups vegetable or peanut oil: High smoke point is crucial! Peanut oil adds a subtle nutty flavor, but vegetable works great. Chef hack: Reuse cooled, strained oil 2-3 times for frying!
- 1 large egg + ½ cup milk: Our trusty egg wash binder. Sub: Buttermilk for extra tang and tenderness (swap 1:1 for milk).
- 1½ cups all-purpose flour + 3 tbsp cornstarch + 1½ tsp baking powder: The crispy dream team! Flour = base, cornstarch = ultra-crunch, baking powder = airy lift. Gluten-free? Use a quality 1:1 GF flour blend.
- ¾ tsp garlic powder + 1 tbsp ground black pepper + 1 tsp paprika: Flavor town! Garlic powder distributes evenly, pepper gives kick, paprika adds color/smokiness.
- 1 tsp Accent flavor enhancer (optional): This is pure MSG – my savory “umami booster.” It deepens flavor without saltiness. Skip if sensitive!
For the Sauce & Assembly:
- ½ cup high-quality mayonnaise (Hellmann’s/Duke’s): Rich base. Low-fat mayo works, but full-fat tastes best.
- 3 tbsp store-bought BBQ sauce: Adds sweetness, smoke, tang. Use your favorite! Chef insight: Hickory-smoked style gives amazing depth.
- 2 tsp Dijon mustard: The tangy backbone! Sub: Yellow mustard for milder bite.
- 6 hamburger buns: Brioche = buttery luxury, potato rolls = soft & sweet, classic sesame = reliable. Toast them!
- Bread-and-butter pickles: Non-negotiable for that sweet-vinegar crunch! Sub: Dill pickles for sharper tang.
Let’s Get Frying: Your Foolproof Roadmap
Ready for crunch? Follow these steps closely – I’ve packed them with all my hard-earned kitchen hacks!
- Brine the Chicken (Juicy Secret Weapon!): In a large bowl, whisk the cold water, salt, and sugar until dissolved. Plunge in the chicken breasts, ensuring they’re submerged. Pop it in the fridge for 30-60 minutes (set a timer!). Why? This brine seasons the chicken all the way through and keeps it crazy juicy during frying. Don’t skip! When time’s up, drain the brine, pat the chicken bone-dry with paper towels. Water + hot oil = scary splatters! If pieces are thick, halve them horizontally so they cook fast and fit the bun.
- Prep Your Coating Station (Stay Organized!): Set up two shallow dishes side-by-side. In one, whisk the egg and milk (or buttermilk!) until smooth. In the other, whisk together the flour, cornstarch, baking powder, garlic powder, black pepper, paprika, and Accent (if using). Chef Hack: Use one hand for wet ingredients, one for dry! Keeps your fingers from becoming a breaded mess.
- Bread Like a Boss (Double-Dip? Maybe!): Working with one piece at a time, dunk the chicken in the egg wash, letting excess drip off. Then, dredge it thoroughly in the flour mixture. Press, press, PRESS the coating on firmly – this ensures maximum crunch and no bald spots! Place the breaded piece on a wire rack set over a baking sheet. Pro Tip: Let them rest for 5-10 minutes while the oil heats. This helps the coating adhere better!
- Fry to Golden Perfection (Safety First!): Pour oil into a large, heavy-bottomed pot (Dutch oven is ideal) until it’s about 2 inches deep. Attach a candy/oil thermometer to the side. Heat over medium-high heat to 350°F (175°C). This temp is CRITICAL! Too low = greasy, too high = burnt outside/raw inside. Carefully lower 2-3 chicken pieces into the hot oil using tongs (don’t crowd!). Fry for 5-6 minutes, flipping halfway, until deeply golden brown and an instant-read thermometer inserted into the thickest part reads 165°F. Watch the oil temp! Adjust heat as needed to maintain 325-350°F during frying. Transfer cooked chicken to a wire rack set over paper towels (lets steam escape, keeps bottom crispy!). Repeat in batches.
- Whip Up the Magic Sauce & Toast Buns: While chicken rests (2-3 mins is perfect!), stir together mayo, BBQ sauce, and Dijon in a small bowl. Taste! Want more tang? Add a smidge more mustard. Toast your buns lightly in a toaster, oven, or buttered skillet. Essential step! Prevents soggy-bottom-bun-syndrome.
- Assemble Your Masterpiece: Slather sauce generously on both top and bottom buns. Place a glorious piece of crispy chicken on the bottom bun. Pile on those bread-and-butter pickles (don’t be shy!). Crown it with the top bun. Serve immediately! The crunch waits for no one.
Plating Up Pure Joy
These sandwiches are stars all on their own! Keep it simple and let that glorious crunch shine. Serve them straight off the fryer on a big, rustic wooden board or individual plates lined with parchment paper for easy clean-up. Add a big stack of napkins – this is gloriously messy business! For a perfect casual feast, pair them with classic sides: crispy french fries (sprinkled with leftover seasoned flour mix!), a simple vinegary coleslaw to cut the richness, or my favorite – chilled dill pickle spears and extra sauce for dipping. Cold beer, lemonade, or sweet iced tea are the ultimate thirst-quenchers alongside. Gather your people and dig in!
Make It Your Own: Delicious Twists!
Love playing with flavors? Try these easy swaps:
- Spicy Nashville Hot: Whisk 2 tbsp cayenne pepper, 1 tbsp brown sugar, and 1 tsp each garlic/onion powder into 1/4 cup hot frying oil right after cooking. Brush this fiery glaze over the fried chicken before assembling! Serve with cool ranch instead of BBQ mayo.
- Lighter Oven “Fried”: Preheat oven to 425°F. Place breaded chicken on a wire rack over a baking sheet. Spray generously with cooking oil. Bake 18-22 mins until crispy and 165°F inside. Still delicious!
- Gourmet Deluxe: Top chicken with melty cheddar or pepper jack cheese during the last minute of frying (cover pot to melt). Add crispy bacon and a handful of fresh arugula tossed in lemon juice.
- Asian Fusion: Swap BBQ sauce in the mayo for sriracha and a squeeze of lime. Add quick-pickled cucumbers and carrots (rice vinegar, sugar, salt) instead of bread-and-butter pickles.
- Keto-Friendly: Skip the bun! Serve chicken over a big salad with the sauce as dressing. Use crushed pork rinds or almond flour in place of regular flour/cornstarch for breading.
The Science of the Perfect Fried Chicken Crust
That shattering crispness that gives way to juicy chicken isn’t magic—it’s science. Let’s break down exactly how each component works to create sandwich perfection:
The Brine Breakdown
The simple saltwater soak does three crucial things:
-
Osmosis in Action: Salt causes chicken proteins to unwind, creating spaces that trap moisture. During cooking, these pockets stay juicy while the exterior crisps.
-
Seasoning Penetration: Unlike surface salting, brining seasons the meat all the way through. The sugar balances flavors and promotes browning.
-
pH Shift: Salt alters the chicken’s protein structure, preventing it from squeezing out moisture too quickly during frying.
Pro Tip: For extra flavor, add garlic powder, hot sauce, or pickle juice to your brine. Just maintain the 2 tbsp salt per 2 cups water ratio.
Coating Chemistry
Our three-part breading system is engineered for maximum crunch:
-
Flour: Forms the base layer that adheres to the chicken
-
Cornstarch: Disrupts gluten formation, preventing toughness while adding crispness
-
Baking Powder: Releases CO₂ when heated, creating micro-bubbles in the crust
The egg wash isn’t just glue—its proteins create a textured surface for the dry coating to grip. Letting breaded chicken rest before frying allows the coating to hydrate slightly, preventing it from sloughing off in the oil.
Frying Physics
At 350°F (175°C), three key reactions occur:
-
Maillard Reaction: Proteins and sugars brown at 285°F+, creating complex flavors
-
Water Evaporation: Surface moisture boils off, allowing crispness
-
Oil Penetration: Proper temperature forms an immediate crust that blocks grease absorption
Use a heavy Dutch oven—it retains heat better than thin pans when cold chicken is added. Maintain oil between 325-350°F; any lower and the chicken absorbs oil, any higher and the coating burns before the meat cooks through.
Crispness Preservation
That wire rack does more than drain—it prevents steam from softening the underside. The 2-3 minute rest allows carryover cooking (internal temp rises 5-10°F) while letting the crust set.
Section 2: Sauce Science & Assembly Architecture
The sauce isn’t an afterthought—it’s a carefully balanced emulsion that complements the crunchy chicken:
Mayo Magic
The neutral fat base carries other flavors while adding richness. Duke’s or Hellmann’s work best because:
-
Higher oil content (80% vs. light mayo’s 50%) creates a thicker, clingier sauce
-
Their slight tang balances the BBQ sauce’s sweetness
-
Contains emulsifiers (lecithin in egg yolks) that keep the sauce smooth
BBQ Sauce Synergy
Choose a sauce with:
-
Molasses or honey for depth
-
Vinegar for brightness
-
Smoked paprika or chipotle to echo the chicken’s paprika crust
Dijon’s Double Duty
Beyond tang, mustard contains:
-
Mucilage (a natural thickener) that stabilizes the sauce
-
Enzymes that help emulsify oil and water-based ingredients
Assembly Engineering
Build your sandwich strategically:
-
Toasted Bun: Creates a moisture barrier—brush with butter first for flavor
-
Sauce on Both Sides: Prevents the bottom bun from getting soggy
-
Pickle Placement: Layer directly on chicken so their acidity cuts through richness
-
Weight Distribution: Place thicker chicken parts toward the back for even bites
Pro Tip: For picnics, pack components separately. Assemble just before eating to maintain texture.
Oil Mastery & Leftover Alchemy
Oil Selection Guide
| Type | Smoke Point | Best For | Notes |
|---|---|---|---|
| Peanut | 450°F | Ideal | Neutral taste, high reuse value |
| Vegetable | 400°F | Great | Affordable, mild flavor |
| Canola | 400°F | Good | May impart slight fishy odor when reused |
| Avocado | 520°F | Luxury | Very stable but expensive |
Oil Maintenance
-
Straining: Pour cooled oil through a coffee filter to remove crumbs
-
Storage: Keep in a dark, cool place in an airtight container
-
Lifespan: Discard when:
-
It smells rancid
-
Turns dark and viscous
-
Smokes below 350°F
-
Develops foam
-
Leftover Transformations
-
Chicken Salad: Shred cold chicken, mix with sauce + celery
-
Breakfast Hash: Cube chicken, fry with potatoes and onions
-
Croutons: Tear leftover buns, toss with oil and chicken seasoning, bake
-
Poutine: Top fries with chopped chicken, cheese curds, and gravy
Batch Cooking Tips
-
Prep Ahead: Brine chicken overnight; mix dry coating
-
Fry in Batches: Keep cooked chicken warm in a 200°F oven
-
Sauce Scaling: Make 2x the sauce—it keeps for 2 weeks refrigerated
Harper’s Extra Nuggets of Wisdom
This recipe? It’s my kitchen workhorse! It started as a desperate attempt to recreate a diner sandwich I loved, failed twice (hello, burnt bits and raw centers!), and finally clicked after I discovered the brine trick. Now, it’s evolved into my go-to for potlucks, bad-day pick-me-ups, and impressing my skeptical nephew (who now requests them weekly!). One hilarious fail turned win? I once ran out of all-purpose flour mid-breading and subbed in pancake mix in a panic. Shockingly, the extra leavening made them puff up like glorious, crispy clouds! Not my usual method, but proof that sometimes kitchen mishaps lead to happy accidents. The biggest lesson? Don’t fear the fry! Use a good thermometer, respect the oil temp, and you’ll nail it. That satisfying CRUNCH when you bite in? Worth every single second. Now go make some memories (and maybe a little mess)!
Your Crispy Chicken Questions, Answered!
Let’s tackle those common sandwich hurdles:
- Q: My coating fell off! What went wrong?
A: Oh, the heartbreak! Usually, it’s one of three things: 1) Chicken wasn’t patted bone-dry after brining (moisture repels coating), 2) The oil wasn’t hot enough (350°F is the sweet spot – a pinch of flour should sizzle vigorously), or 3) You didn’t press the coating on firmly enough during dredging. Really pack it on! Letting the breaded pieces rest for 5-10 mins before frying also helps adhesion. - Q: Can I make these ahead of time?
A: You can brine the chicken up to 4 hours ahead (keep chilled). You can also mix the dry coating and make the sauce ahead. But fry just before serving! Reheating fried chicken makes it lose its magic crispiness. If you MUST, reheat uncovered on a wire rack in a 375°F oven for 10-15 mins until hot, but expect slightly less crunch. - Q: Help! My chicken is burnt outside but raw inside.
A: Classic sign your oil was too hot! Next time, ensure you’re starting at a steady 350°F. When you add the chicken, the temp will drop – adjust the heat to keep it around 325-350°F throughout cooking. Also, make sure your chicken pieces are evenly sized (butterfly thick breasts!) so they cook at the same rate. Use that instant-read thermometer! - Q: What do I do with all this leftover oil?
A: Don’t pour it down the drain! Once completely cooled, strain it through a fine-mesh sieve lined with cheesecloth or a coffee filter into a container. Store it in the fridge and reuse it for frying 2-3 more times (it picks up flavor!). When it’s done, cool completely, seal the container, and trash it (check local disposal rules).

Crispy Fried Chicken Sandwiches
- Total Time: 1½ hrs
Description
Some recipes just shout celebration – and these golden, ultra-crunchy chicken sandwiches do exactly that. Born in the chaos of a July cookout, they quickly stole the spotlight from ribs and brisket. The first bite? Crackly coating, juicy center, sweet pickles, and tangy sauce. Instant crowd pleaser. Whether you’re frying for family or just treating yourself, this sandwich brings restaurant-worthy satisfaction straight to your kitchen. Let’s crunch into something unforgettable.
Ingredients
For the Chicken:
-
3 boneless chicken breasts
-
2 cups cold water
-
2 tbsp + ¾ tsp salt
-
2 tsp sugar
-
1 large egg
-
½ cup milk (or buttermilk)
-
1½ cups all-purpose flour
-
3 tbsp cornstarch
-
1½ tsp baking powder
-
¾ tsp garlic powder
-
1 tbsp black pepper
-
1 tsp paprika
-
1 tsp MSG (optional)
-
Vegetable or peanut oil for frying
For Sauce & Assembly:
-
½ cup mayonnaise
-
3 tbsp BBQ sauce
-
2 tsp Dijon mustard
-
6 buns (brioche or potato rolls)
-
Bread-and-butter pickles
Instructions
-
Brine Chicken (30–60 mins):
Soak chicken in salted-sugar water. Drain and pat dry. Halve thick pieces if needed. -
Set Up Coating Station:
Mix egg & milk in one bowl. In another, combine flour, cornstarch, spices, baking powder. -
Bread & Rest:
Dip chicken in egg wash, then coat firmly in flour mix. Rest on rack 5–10 mins. -
Fry (5–6 mins per batch):
Heat oil to 350°F. Fry in small batches until golden and 165°F inside. Drain on a wire rack. -
Make Sauce & Toast Buns:
Mix mayo, BBQ sauce, Dijon. Toast buns lightly. -
Assemble:
Spread sauce on buns, add fried chicken and pickles. Serve hot.
Notes
-
Brining is non-negotiable: That simple salt-sugar soak keeps the chicken ultra-juicy. Don’t skip it!
-
Pat chicken completely dry: Moisture causes the coating to slip off and oil to splatter.
-
Use both hands: One for wet (egg wash), one for dry (flour mix) to avoid clumping.
-
Press coating firmly: This ensures maximum crunch and keeps it from falling off in the oil.
-
Rest before frying: Letting breaded chicken sit 5–10 minutes sets the crust and improves adhesion.
-
Monitor oil temperature: Keep it between 325–350°F. A thermometer is your best friend here!
-
Don’t crowd the pot: Fry in batches to maintain oil temp and even cooking.
- Prep Time: 30 mins
- Cook Time: 40 mins
Nutrition
- Calories: 620 kcal per serving
- Fat: 35g
- Carbohydrates: 45g
- Protein: 32g
Final Thoughts
This sandwich represents the perfect balance of texture, temperature, and taste. With its juicy brined chicken, scientifically crafted crust, and balanced sauce, it’s more than a meal—it’s an experience worth sharing.
Category: Comfort Food / Fried Chicken Recipes / Sandwich Specialties
The Delicious Details (Approx. Per Sandwich)
Calories: ~620 | Fat: 35g | Protein: 32g | Carbs: 45g
Prep Time: 30 mins (plus brining) | Cook Time: 15 mins | Serves: 6