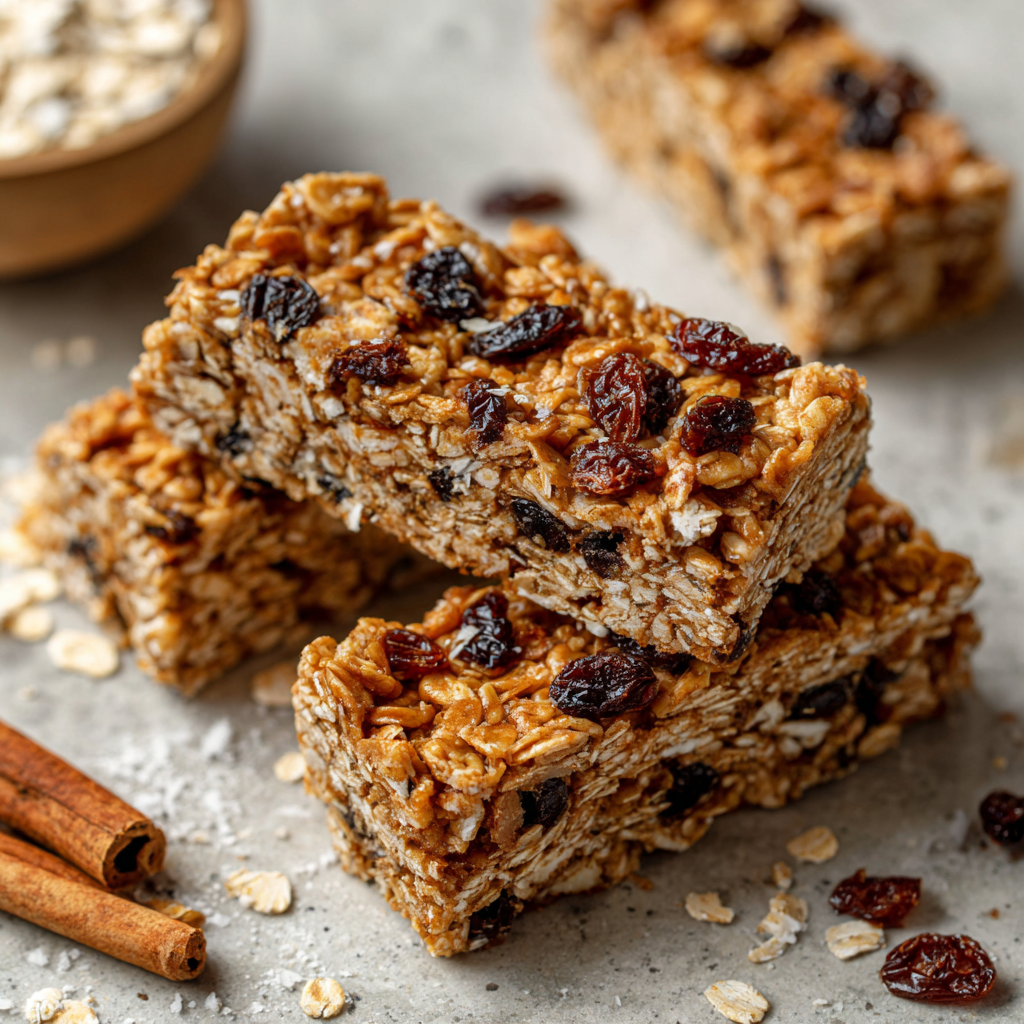
Your New Favorite Grab-and-Go Snack Just Walked Into the Kitchen!
Hey sunshine! ✨ Harper here, wooden spoon in hand and cinnamon dust on my apron. Ever have one of those days where you’re racing between school pickups, work Zooms, and that mystery appointment you forgot to write down? (No judgment—my calendar once accidentally had “defrost freezer” scheduled for three Tuesdays straight). That’s when these magical Cinnamon Raisin Granola Bars swoop in like a cape-wearing superhero. Imagine your coziest oatmeal cookie and your crunchiest granola eloping to create the perfect portable snack—sweet without being sugary, hearty without weighing you down. These little bars are my secret weapon against hangry meltdowns (mine AND my toddler’s). They’re the edible equivalent of a warm hug, packed with chewy raisins, toasty oats, and that nostalgic cinnamon swirl that makes everything feel like a crisp autumn morning. Best part? You probably have EVERY ingredient in your pantry RIGHT NOW. No fancy equipment, no fussy techniques—just pure, uncomplicated joy in bar form. Ready to make your snack drawer infinitely happier? Let’s get mixing!
The Trail Mix Debacle & My Granola Bar Epiphany
Picture this: It’s 2017, and I’m attempting my first “serious” hike with friends. Being the eager newbie, I volunteered to bring snacks. What could go wrong with homemade trail mix? Famous. Last. Words. Let’s just say my “creative” blend of wasabi peas, dark chocolate chunks, and dried pineapple became a cautionary tale involving a squirrel ambush and chocolate smears on someone’s brand-new hiking poles. Later, starving and slightly traumatized, one friend pulled out a crumbly store-bought cinnamon raisin granola bar. That first bite? Pure redemption. Chewy, sweet-but-not-cloying, with little raisin jewels. But the ingredient list read like a chemistry experiment! Driving home, I was obsessed: Could I make these BETTER? My kitchen became a granola bar laboratory for weeks. Batch 4 was too sticky (RIP my favorite spatula). Batch 7 tasted like cardboard. Then came the “aha!” moment: swapping processed syrups for honey and adding a pinch of salt to make the cinnamon SING. When my hiking crew begged for the recipe after tasting Batch 12, I knew we had gold. Now, these bars are my edible apology to nature—and my most-requested snack!
Your Pantry’s Greatest Hits (Plus a Few Backups!)
- 2 cups rolled oats – Not quick oats! Rolled oats give that perfect chew. Gluten-free friends: Use certified GF oats!
- ½ cup raisins – I love regular or golden raisins here. Stale? Plump ’em up in warm water for 5 mins!
- ½ cup shredded coconut – Unsweetened adds texture without extra sugar. Allergy alert? Skip it or swap with sunflower seeds.
- 1 tsp ground cinnamon – The soul of this bar! Pro tip: Saigon cinnamon has extra warmth.
- ⅓ cup honey – Our natural glue! Vegan? Maple syrup works beautifully.
- ¼ cup butter or coconut oil – Butter = rich flavor. Coconut oil = dairy-free + tropical vibe. Melted, not softened!
- 1 tsp vanilla extract – The flavor booster. Splurge on pure vanilla if you can!
- Pinch of salt – Non-negotiable. It makes the cinnamon and honey pop!
Let’s Build Some Bars! (No Hard Hat Required)
Step 1: In a small saucepan, combine honey and butter/coconut oil. Melt over LOW heat (we’re not boiling, just warming!). Stir until it’s a smooth, golden pool. Harper’s Hack: Swirl the pan instead of stirring constantly—prevents crystalization! Remove from heat.
Step 2: Stir in vanilla and salt. That vanilla will sizzle and perfume your whole kitchen—deep breaths encouraged! Why now? Heat can evaporate vanilla’s magic if added too early.
Step 3: Dump oats, raisins, coconut, and cinnamon into a BIG bowl. Toss like you’re mixing confetti. Feeling fancy? Add ¼ tsp nutmeg for extra cozy vibes.
Step 4: Pour your warm honey mixture over the dry ingredients. Use a sturdy spatula to fold and press until every oat is shiny and happy. Arm workout alert! It’ll seem dry at first—keep faith and keep pressing.
Step 5: Line an 8×8 pan with parchment paper (let some hang over the edges—lifesaver for lifting bars out!). Scoop your mixture in and PRESS. DOWN. HARD. Use the bottom of a glass or a measuring cup. Seriously, channel your inner Hulk here. Tight packing = no crumbly bars!
Step 6: Chill in the fridge for at least 1 hour (2 is golden). Impatient? Freezer for 30 mins works in a pinch! This sets the “glue.”
Step 7: Lift bars out using parchment “handles.” Slice into 10 rectangles (or squares, or fun triangles!). Hot knife trick: Run your knife under hot water for cleaner cuts!
Beyond the Lunchbox: Let’s Get Creative!
Obviously, these are stellar solo acts tucked into backpacks. But let’s gild the lily! Crumble one warm over vanilla ice cream—instant gourmet dessert. Pair with sharp cheddar for a sweet-savory snack plate that’ll wow guests. Morning magic? Place a bar in a bowl, splash with milk, and microwave 30 seconds for deconstructed oatmeal cookie cereal (trust me!). For picnics, stack bars in a mason jar tied with twine—rustic charm unlocked!
The Science Behind the Perfect Granola Bar Texture
Creating the ideal granola bar is a delicate balance between chewiness, crunch, and cohesion. Too sticky, and it’s a mess; too dry, and it crumbles into dust. So, what’s the secret? It all comes down to binding agents, moisture control, and ingredient ratios.
The Role of Binding Agents
Honey is the MVP here—its natural sugars crystallize when cooled, acting like edible glue. But it’s not the only option:
-
Maple syrup offers a deeper flavor but is slightly less sticky.
-
Brown rice syrup (a pro baker’s secret) creates a firmer hold.
-
Nut butters add protein while helping bind, but they can make bars denser.
For the best texture, warm your binder (like honey or syrup) just enough to thin it out, ensuring even distribution. Overheating can break down its binding power.
Moisture Matters
Granola bars walk a tightrope between dry and soggy. Rolled oats are essential—they absorb moisture without turning mushy (unlike quick oats). If your mix feels too wet, add a tablespoon of oat flour or almond flour to soak up excess. Too dry? A splash of applesauce or mashed banana can help—just don’t overdo it!
The Pressing Principle
Ever cut into a bar only to watch it disintegrate? Compression is key. Use a flat-bottomed glass or a measuring cup to press the mixture firmly into the pan. The tighter the pack, the better the bars hold. Chilling is non-negotiable—it solidifies the binders. Skipping this step is like building a sandcastle without water.
Pro Tip: For extra crunch, toast your oats and coconut at 350°F for 10 minutes before mixing. It deepens the flavor and adds a satisfying snap!
The Psychology of Snacking—Why We Crave These Bars
Ever wonder why some snacks feel irresistible while others are forgettable? These cinnamon raisin granola bars hit three psychological sweet spots: nostalgia, convenience, and sensory satisfaction.
Nostalgia in Every Bite
Cinnamon and raisins evoke childhood memories—oatmeal cookies, Saturday morning pancakes, or grandma’s kitchen. Comfort foods trigger dopamine, the brain’s “feel-good” chemical. That’s why these bars don’t just fill your stomach; they feel like a hug.
The Convenience Factor
Our brains are wired to seek efficiency. A grab-and-go snack that’s portable, non-messy, and energy-dense checks all the boxes for busy lives. Unlike an apple (juicy hands) or yogurt (spoon required), these bars are one-handed perfection.
Texture Symphony
The best snacks engage multiple senses:
-
Chewy (raisins)
-
Crunchy (toasted oats)
-
Creamy (melted honey)
This variety prevents “flavor fatigue,” where your taste buds get bored. Bonus: The cinnamon aroma stimulates appetite—a trick bakeries have used for centuries!
Fun Fact: Studies show people snack more for emotional reasons than hunger. These bars, with their cozy spice and sweetness, are the ultimate edible stress reliever.
Granola Bars Around the World (And How to Borrow Their Best Ideas)
Granola bars might feel quintessentially American, but cultures worldwide have their own portable energy bites. Here’s how to steal their genius:
Japan’s Soy Sauce Twist
Japanese kakimochi (rice crackers) balance sweet and savory with soy sauce and sesame. Try this: Replace 1 tbsp honey with 1 tsp soy sauce + 1 tbsp brown sugar. Add black sesame seeds for a grown-up edge.
India’s Spice Game
Chikki (a brittle made with jaggery and nuts) packs cardamom and ginger. Upgrade your bars: Swap raisins for chopped dates, add ½ tsp cardamom, and mix in pistachios.
South Africa’s Coconut Obsession
Muesli rusks (twice-baked granola bars) are dunked in coffee. Copy them: Bake your chilled bars at 300°F for 20 minutes for a dry, crunchy texture perfect for dipping.
Sweden’s Fiber Boost
Nordic knäckebröd (crispbread) often uses seeds. Go Scandinavian: Add 2 tbsp each of flaxseeds, pumpkin seeds, and dried lingonberries for a tart, earthy bar.
Global Pro Tip: Wrap bars in wax paper + twine for a French pique-nique vibe, or stack them in a bento box for Japanese obento charm.Play With Your Food! (My Favorite Game)
This recipe is your canvas! Try these twists:
- Apple Pie Twist: Swap raisins for ⅓ cup dried apples + ¼ tsp allspice
- Tropical Escape: Use mango chunks instead of raisins + add 2 tbsp chopped macadamia nuts
- Chocoholic’s Dream: Stir in ¼ cup mini chocolate chips AFTER mixing (so they don’t melt!)
- Protein Power-Up: Add 2 tbsp chia seeds + 3 tbsp peanut butter to the honey mixture
- Nut-Free Zone: Replace coconut with puffed quinoa or extra oats
Confessions from My Flour-Dusted Notebook ✍️
These bars have seen some things! Batch #3 famously stuck to the pan like cement—hence my parchment paper obsession. Lesson learned! I also used to bake them (350°F for 15 mins) for extra crunch, but chilling won for its no-heat, fudgy chew. My neighbor’s kid calls them “Cookie Bars,” and honestly? I don’t correct her. Pro tip: Double the batch and freeze half! They thaw in 10 minutes, and future-you will high-five past-you during chaotic mornings. Biggest evolution? Realizing granola bars shouldn’t taste “healthy”—they should taste like happiness with oats. Mission accomplished.
Granola Bar Therapy Session (You Got This!)
Q: Help! My bars crumbled when I cut them!
A: Next time, press HARDER (seriously, lean into it!) and chill longer. If it’s too late, congratulations—you made granola cereal! Sprinkle over yogurt.
Q: Can I use quick oats instead of rolled?
A: I don’t recommend it—quick oats get mushy. Rolled oats give that perfect chew. In a bind? Use 1.5 cups quick oats + ½ cup crushed bran flakes for texture.
Q: Why aren’t my bars sweet enough?
A: Taste your honey! Some are milder. Next time, add 1 tbsp brown sugar to the wet mix. Or drizzle melted chocolate on top now—problem solved deliciously.
Q: How long do they last?
A: 1 week in an airtight container at room temp, 3 weeks refrigerated, or 3 months frozen (they defrost FAST!). Layer with parchment to prevent sticking.
Print
Cinnamon Raisin Granola Bars
- Total Time: 1 hr 15 mins
Description
Meet your new snack-time soulmate: soft, chewy, cinnamon-kissed bars packed with raisins, coconut, and oat-y comfort. No baking, no stress—just pantry staples turned into cozy, grab-and-go goodness that tastes like a warm hug in every bite.
Ingredients
-
2 cups rolled oats
-
½ cup raisins (regular or golden)
-
½ cup shredded coconut (unsweetened)
-
1 tsp ground cinnamon
-
⅓ cup honey (or maple syrup for vegan)
-
¼ cup butter or coconut oil, melted
-
1 tsp vanilla extract
-
Pinch of salt
Instructions
-
Melt the magic: In a saucepan, melt honey and butter/oil over low heat until smooth. Remove from heat, then stir in vanilla and salt.
-
Mix it dry: In a large bowl, combine oats, raisins, coconut, and cinnamon. Toss to combine.
-
Bring it together: Pour warm honey mixture over the dry mix. Stir until every oat is coated and sticky.
-
Pack it in: Line an 8×8 pan with parchment. Firmly press the mixture into the pan—really compact it!
-
Chill: Refrigerate 1–2 hours or freeze for 30 minutes until firm.
-
Slice & store: Cut into 10 bars. Store in an airtight container up to 1 week (or freeze 3 months).
Notes
-
For extra chew, soak raisins in warm water 5 mins first.
-
Want more crunch? Bake at 350°F for 15 mins before chilling.
-
No coconut? Use sunflower seeds or more oats.
-
Add-ins: Dried apples, chopped nuts, or chocolate chips (after mixing).
- Prep Time: 10 mins
Nutrition
- Calories: 150 kcal per serving
- Sugar: 11g
- Fat: 6g
- Carbohydrates: 22g
- Fiber: 2g
- Protein: 2g
Nourishment & Joy (Because Both Matter!)
Per bar (makes 10): Calories: 150 | Fat: 6g | Carbs: 22g | Fiber: 2g | Sugar: 11g (mostly from honey & fruit!) | Protein: 2g
Final Thoughts: More Than Just a Snack
These cinnamon raisin granola bars aren’t just fuel—they’re tiny acts of self-care. In a world of ultra-processed snacks, taking 10 minutes to mix wholesome ingredients is a rebellion. They’re proof that simple food, made with intention, can be revolutionary.
Whether you’re packing them for a hike, sneaking one at 3 p.m., or crumbling them over ice cream, these bars are a reminder that joy doesn’t have to be complicated. So here’s to sticky fingers, satisfied cravings, and snack drawers that spark happiness. Now, go forth and snack fearlessly!