There’s Magic Between Two Slices of Bread
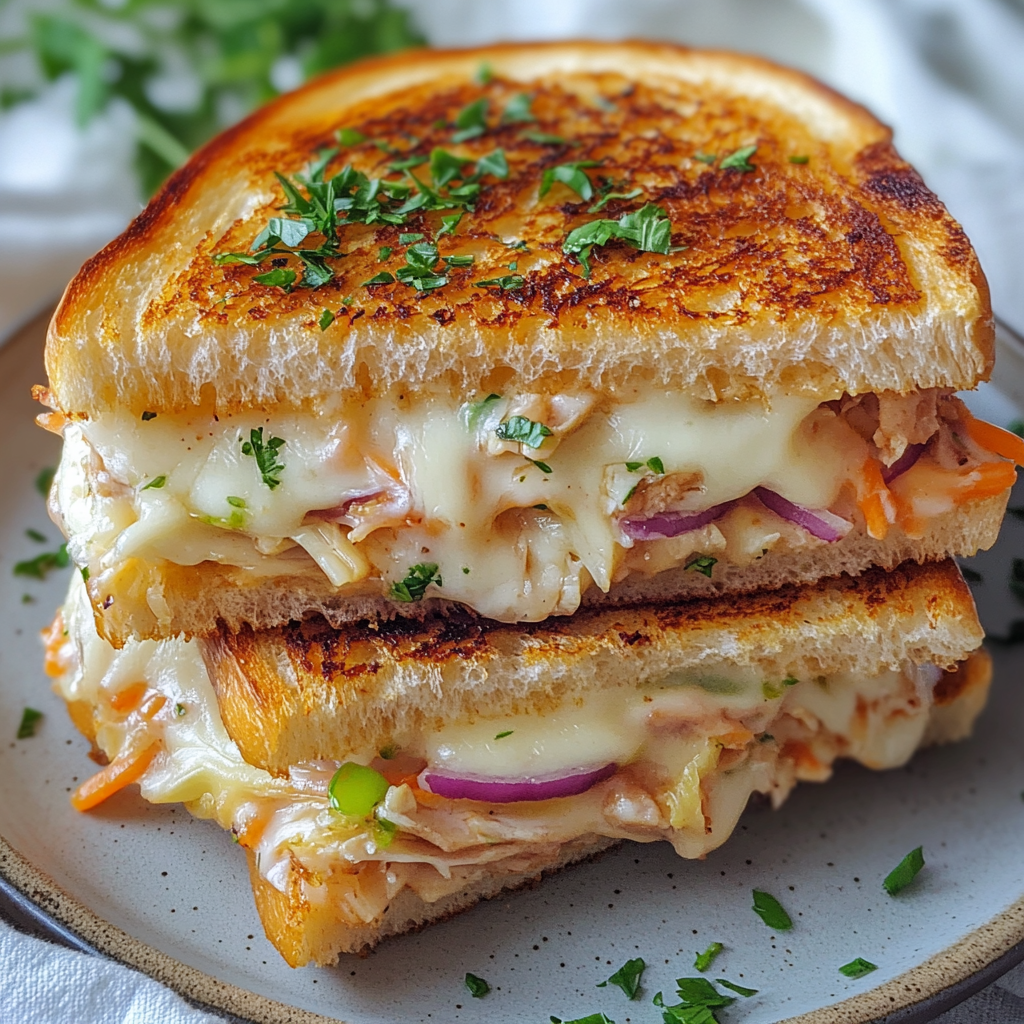
Hey, kitchen pals! Harper here, wooden spoon in hand and a grin on my face because we’re diving into pure, unapologetic comfort food today. Picture this: golden, buttery bread giving you that satisfying *crunch*, giving way to a creamy, savory chicken filling that’s hugging not one, but TWO kinds of melty, stretchy cheese. Yeah, we’re making my legendary Cheesy Chicken Melt Sandwich. 🥪✨ This isn’t just lunch; it’s a warm hug disguised as a sandwich. The first time I whipped this up? My husband Dan hovered near the stove like a hopeful seagull, and my neighbor texted, “What smells AMAZING?” before I’d even plated. That’s the power of crispy bread meeting cheesy, creamy goodness. It’s perfect for chaotic weeknights, lazy picnics, or when you need a little edible sunshine. Forget complicated techniques—we’re keeping it joyful, approachable, and packed with flavor. Ready to make your kitchen smell like heaven and your taste buds do a happy dance? Let’s get sizzling!
That One Rainy Tuesday & a Sandwich Revelation
Okay, story time! This sandwich was born on a truly *glorious* disaster of a day. Picture it: Portland drizzle, a broken umbrella, and me tracking muddy footprints into the kitchen after a grocery run gone wrong. I was soaked, hangry, and staring blankly at chicken breasts and leftover veggies. “Comfort food STAT,” my brain demanded. I’d been experimenting with chicken salads but craved something WARM and gooey. So, I shredded that chicken, mixed it with mayo, sour cream, and every veggie in my crisper drawer (carrots, cabbage, the works!), then went wild—smoked paprika for that campfire coziness, Dijon for a little zing. But the real game-changer? Slapping it between bread with DOUBLE CHEESE and grilling it until the cheddar and provolone did that irresistible lava-flow thing. That first bite? Pure bliss. The crunch! The creaminess! The way the cheese pulled… Dan took one look, stole a bite, and mumbled, “You’re not getting this back.” Rainy days? Officially upgraded. That messy kitchen moment birthed our forever favorite “cheat code” for turning frowns (and basic ingredients) upside down.
Your Flavor Toolkit: What You’ll Need
Gather ’round, friends! This is where the magic starts. Don’t stress about exact perfection—these are flexible building blocks. Pro tip: Mise en place (a fancy way of saying “get everything prepped before cooking”) is your bestie here. It makes assembly a breeze!
- Boneless Chicken Breast (1 lb): The star! Keeps it lean and shreds beautifully. Swap it: Thighs work for extra richness, or use leftover rotisserie chicken for a 10-minute shortcut (skip cooking step!).
- Salt, Smoked Paprika, Black Pepper, Garlic Powder, Onion Powder (Spices!): Our flavor foundation. Smoked paprika is the MVP – it adds that deep, cozy “grilled” vibe without a grill. Insider Tip: If your paprika smells dusty? Toss it! Fresh spice = BIG flavor.
- Oil (2 tbsp + more): For searing. Avocado or canola oil handle high heat like champs.
- Red Onion (½, diced): Sharp bite! Soak diced pieces in ice water for 5 mins if raw onion is too intense for you – mellows it right out.
- Carrots (½ cup, boiled & cubed): Sweetness and crunch! Chef Hack: Microwave diced carrots with a splash of water for 2 mins instead of boiling.
- Cabbage (⅓ cup, diced): Adds freshness and texture. Green or red works!
- Green Onions & Fresh Parsley (⅓ cup sliced + 1 tbsp chopped): Brightness heroes! Flat-leaf parsley has more flavor than curly, but use what you’ve got.
- Mayonnaise (¾ cup) & Sour Cream (⅓ cup): Creamy dream team! Mayo gives body, sour cream adds tang. Lighter Swap: Greek yogurt works for sour cream, but the mayo is key for richness.
- Dijon Mustard (1 tbsp): Our secret zing! Cuts through richness. Yellow mustard works in a pinch.
- White Bread (20-25 slices): The vessel! Sturdy sandwich bread like Texas toast holds up best. Sourdough? Delicious twist!
- Cheddar & Provolone Slices (10 slices each): The MELT masters! Cheddar = sharpness, Provolone = stretch. Fun Fact: Pre-sliced cheese melts faster than blocks – crucial for that perfect ooze!
Let’s Build Some Deliciousness: Step-by-Step!
Okay, team! Put on your favorite tunes, maybe do a little shimmy with that wooden spoon (just me?), and let’s make some magic happen. Active voice engaged!
- Conquer the Chicken: Pat those chicken breasts dry (trust me, dry = golden sear!). Rub them ALL over with the salt, smoked paprika, black pepper, garlic powder, and onion powder. Heat your oil in a skillet over medium-high heat. Once it shimmers, add the chicken! Sear for 5-7 mins per side, until gorgeously golden and cooked through (165°F internal temp). Harper’s Hot Tip: DON’T move it around! Let it get that beautiful crust. Transfer to a plate, tent with foil, and LET IT REST for 5-10 mins. This keeps it juicy! Shred it with two forks or dice it small. Time Saver: Do this step ahead! Cold chicken shreds even easier.
- Whip Up the Dreamy Filling: Grab a BIG bowl. Toss in your shredded chicken, diced red onion, boiled/cubed carrots, diced cabbage, sliced green onions, and chopped parsley. In a smaller bowl, whisk together the mayo, sour cream, Dijon mustard, garlic powder, black pepper, smoked paprika, and a pinch of salt. Pour this creamy bliss over the chicken/veggie mix! Mix Master Move: Use a sturdy spatula and fold gently but thoroughly until everything is perfectly coated and creamy. Taste it! Adjust salt or pepper? More Dijon zip? Make it YOURS.
- Sandwich Assembly Line: Lay out your bread slices. Spoon a generous amount of filling onto one slice (cover it well, edge to edge!). Top the filling with ONE slice of cheddar AND ONE slice of provolone. The double-cheese power move! Place the second bread slice on top, pressing down gently. Pro Tip: Butter the *outer* sides of the bread lightly if you want EXTRA golden, crispy perfection (highly recommended!).
- Grill to Golden, Cheesy Glory: Heat a clean skillet, griddle, or panini press over medium-low heat (too hot = burnt outside, cold inside!). Place your sandwiches in the skillet. Cook for 3-4 minutes per side, pressing down gently with a spatula, until the bread is deeply golden brown and the cheese is visibly melting out the sides. The Flip Trick: Peek after 2 mins. Golden? Flip! If using a press, cook for 4-5 mins total. Listen for that satisfying sizzle!
Smell that? That’s victory. And melted cheese. Basically the same thing.
Plate It Like You Mean It!
Don’t just slap it on a plate! Let’s make it feel special. Slice these beauties diagonally – those cheesy layers look *incredible* peeking out. Serve ’em hot off the skillet with:
- A big handful of crispy potato chips or sweet potato fries for that perfect salty/crunchy contrast.
- A simple, tangy side salad (think mixed greens with lemon vinaigrette) to cut the richness.
- Classic dill pickle spears – the vinegar bite is magic with the creamy filling.
For a crowd? Stack them on a wooden board with extra pickles and mustard for dipping. Pure picnic perfection!
Make It Your Own: Delicious Twists!
This recipe is your playground! Here are some fun ways to riff:
- Buffalo Blue: Swap cheddar for crumbled blue cheese and stir 2-3 tbsp of hot sauce into the filling! Celery sticks on the side are a must.
- Mediterranean Sunshine: Add ¼ cup chopped sun-dried tomatoes and 2 tbsp chopped Kalamata olives to the filling. Swap provolone for mozzarella! Serve with tzatziki.
- Light & Lively: Use Greek yogurt instead of sour cream, light mayo, and load up on extra cabbage/carrots. Serve on whole-wheat bread.
- BBQ Ranch Twist: Mix 2 tbsp BBQ sauce into the filling and swap Dijon for ranch seasoning! Cheddar + Monterey Jack cheese combo works great here.
- Veggie Power (Veggie Option!): Skip chicken! Use 2 cups cooked, rinsed lentils or chickpeas (mashed slightly) and boost the carrots/cabbage. Add 1 tsp liquid smoke for depth.
Harper’s Heart-to-Heart (and Kitchen Confessions!)
This sandwich has seriously evolved! My first attempt? I used *way* too much mayo (soggy bread city!) and forgot to rest the chicken (dry shreds, ugh). Lesson learned! The key is balancing the creamy filling so it’s lush but not drippy. Over the years, adding the boiled carrots became a revelation – that subtle sweetness against the smoky paprika? Chef’s kiss! One hilarious fail involved using super fresh, soft bread… it completely disintegrated during flipping. Cue cheesy skillet scramble (still tasty, just… not sandwich-shaped!). Now I swear by sturdier loaves. Honestly, the best part is how forgiving it is. Leftover turkey after Thanksgiving? Toss it in! Random herbs wilting? Chop ’em in! This recipe is less about rigid rules and more about embracing the cheesy, comforting spirit. Make it messy, make it yours, and always make extra – they disappear faster than you can say “Is that MY sandwich?!”
The Science of the Perfect Melt (And How to Nail It Every Time)
Let’s geek out for a second—because there’s actual science behind why this sandwich is so irresistibly gooey. Cheese melting is a delicate dance of temperature, fat content, and moisture. Here’s how to master it:
1. Cheese Selection Matters
Not all cheeses melt equally! Provolone and cheddar are our dream team because:
-
Provolone has high moisture and just enough acidity to stay smooth (no grainy texture!).
-
Cheddar brings fat content for richness but needs help from provolone to avoid splitting (that oily puddle nobody wants).
Avoid pre-shredded cheese—it’s coated in anti-caking agents that can make melts clumpy.
2. Low and Slow Wins the Race
High heat = burnt bread + unmelted cheese. Medium-low heat lets the cheese melt while the bread crisps evenly. Pro tip: Cover the skillet with a lid for the last minute to trap steam, which speeds up melting without extra browning.
3. The Butter Debate
Buttering the bread’s exterior isn’t just for flavor—it creates a barrier that slows moisture absorption, preventing sogginess. For extra crunch, use mayonnaise instead of butter. Its higher smoke point means deeper golden color without burning.
4. The Filling-to-Cheese Ratio
Too much filling = structural collapse. Aim for a ¼-inch layer of chicken mix, topped with cheese that extends just beyond the edges. As it melts, it’ll “glue” the sandwich shut, locking in goodness.
Troubleshooting:
-
Greasy cheese? Blot excess oil with a paper towel post-grill.
-
Bread sticking? Ensure your skillet is properly heated before adding the sandwich.
-
Uneven melt? Let cheese sit at room temp for 10 minutes before assembling.
Fun fact: The ideal melt temperature for cheddar is 150°F (65°C)—use a infrared thermometer if you’re extra precise!
Global Sandwich Inspirations: Twists on the Classic
Why stop at one flavor? This cheesy chicken melt is a blank canvas for global flair. Here are three showstopping variations:
1. Bombay Spiced Melt
-
Filling Add-Ins: 1 tsp garam masala + ½ tsp turmeric in the chicken rub. Swap cabbage for shredded cucumber (toss with salt, drain excess water).
-
Cheese: Gouda (for smokiness) + a sprinkle of amul (Indian processed cheese, if available).
-
Serve With: Mint chutney for dipping and mango pickle on the side.
2. Italian Nonna’s Melt
-
Filling Add-Ins: Fold in ¼ cup chopped roasted red peppers + 1 tbsp chopped basil.
-
Cheese: Fresh mozzarella (pat dry first!) + grated pecorino romano.
-
Bread: Ciabatta, brushed with garlic-infused olive oil.
-
Pro Tip: Press in a panini maker for those gorgeous grill marks.
3. Korean BBQ Crunch Melt
-
Filling Add-Ins: Toss chicken with 2 tbsp gochujang (Korean chili paste) + 1 tbsp honey. Add quick-pickled carrots (rice vinegar + sugar) instead of boiled.
-
Cheese: Pepper jack for heat + a slice of American (for meltability).
-
Topping: After grilling, sprinkle with toasted sesame seeds and crushed seaweed snacks.
Why It Works: Each twist respects the original formula—creamy + crunchy + cheesy—while layering in bold, authentic flavors.
The Leftover Game: Reinventing Your Melt
Got extra filling? Don’t waste it! Here’s how to repurpose it into 3 new meals:
1. Cheesy Chicken Melt Stuffed Peppers
-
Halve bell peppers, stuff with filling, top with cheese, and bake at 375°F (190°C) for 20 mins. Broil for 2 mins for bubbly cheese.
2. Loaded Chicken Melt Fries
-
Pile filling over crispy fries, add extra cheese, and broil until melted. Drizzle with ranch or hot sauce.
3. Breakfast Omelet Upgrade
-
Whisk 2 eggs, pour into a skillet, and spoon filling over one half. Fold, top with cheese, and cover to melt.
Storage Tips:
-
Filling lasts 3 days in the fridge or 1 month frozen (thaw overnight before using).
-
Avoid freezing assembled sandwiches—the bread turns gummy.
Pro Move: Mix leftover filling with cooked pasta, bake with breadcrumbs, and call it “Cheesy Chicken Pasta Bake.” Dinner solved!
Your Cheesy Chicken Melt Questions, Solved!
Let’s tackle those kitchen hiccups before they happen!
- Q: Help! My filling is too runny/soggy!
A: Fear not! This usually means too much mayo/sour cream or veggies releasing water. Fix it: Drain any liquid from boiled carrots/cabbage before adding. Start with ½ cup mayo, mix, then add more only if needed. If it’s already mixed, pop it in the fridge for 20-30 mins to firm up before assembling. - Q: Why isn’t my cheese melting properly? Bread burns before cheese oozes!
A: Classic issue! Your heat is likely too high. Solution: Cook over medium-low heat. Cover the skillet with a lid or large metal bowl for the last 1-2 mins per side – this traps steam and melts cheese FAST without scorching the bread. Using pre-sliced cheese (not thick blocks) also helps! - Q: Can I make these ahead of time?
A: Absolutely! Prep the filling up to 2 days ahead (store airtight in the fridge – flavors meld beautifully!). Assemble sandwiches *without* grilling and wrap tightly in plastic wrap. Refrigerate up to 6 hours. Grill straight from the fridge, adding 1-2 extra mins per side since they’re cold. Don’t assemble too far ahead or bread gets soggy. - Q: Any tips for freezing?
A: Yes! Assemble sandwiches *without* grilling. Wrap each tightly in plastic wrap, then foil. Freeze for up to 1 month. Thaw overnight in the fridge, then grill as usual! Perfect for emergency comfort food cravings.

Cheesy Chicken Melt Sandwich
- Total Time: 30 mins
Description
This sandwich was born on a drizzly Tuesday in Portland when I was cold, soaked, and starving. One look at my fridge, and out came a leftover chicken breast, tired carrots, and half a cabbage. Somehow, that soggy moment sparked kitchen magic. I mixed it all with mayo, tangy mustard, smoky paprika—and tucked it between two buttered slices with double cheese. One sizzling flip later, it became my comfort classic. Whether you’re escaping a rough day or feeding a hungry crew, this sandwich wraps you in melty, crunchy joy. Let’s bring that magic to your table.
Ingredients
-
1 lb boneless chicken breast (or rotisserie chicken)
-
½ red onion, diced
-
½ cup boiled carrots, diced
-
⅓ cup cabbage, diced
-
⅓ cup green onions, sliced
-
1 tbsp fresh parsley, chopped
-
¾ cup mayo
-
⅓ cup sour cream
-
1 tbsp Dijon mustard
-
Spices: 1 tsp each of salt, smoked paprika, black pepper, garlic powder, onion powder
-
10 slices cheddar cheese
-
10 slices provolone cheese
-
20 slices white sandwich bread
-
Butter or oil for grilling
Instructions
-
Cook Chicken: Season with spices. Sear in oil 5–7 mins per side. Rest 5 mins, then shred.
-
Mix Filling: Combine chicken, veggies, and herbs. In another bowl, whisk mayo, sour cream, mustard, and spices. Mix all until creamy and cohesive.
-
Assemble Sandwiches: Spread filling on bread, top with cheddar & provolone, and close. Butter outsides.
-
Grill to Perfection: Cook 3–4 mins per side over medium-low heat until golden and cheese melts.
Notes
-
Too runny? Chill filling first.
-
Cheese not melting? Lower heat, cover while grilling.
-
Freeze assembled (uncooked) sandwiches for up to 1 month!
- Prep Time: 15 mins
- Cook Time: 15 mins
Nutrition
- Serving Size: 10 sandwiches
- Calories: ~480 kcal per serving
Nutritional Info (Approximate per Sandwich)
Calories: ~480 | Fat: 28g | Saturated Fat: 10g | Carbohydrates: 32g | Fiber: 2g | Sugar: 4g | Protein: 25g
Note: Values vary based on specific ingredients/bread used. Using light mayo/yogurt and whole wheat bread lowers calories/fat.