
No Bake Peanut Butter Oat Cups: A Delicious & Easy Treat
If you’re looking for a quick, healthy, and delicious dessert that requires no baking, then No Bake Peanut Butter Oat Cups are the perfect choice! These irresistible treats combine creamy peanut butter, wholesome oats, and rich chocolate for a snack that’s both satisfying and easy to make.
In this comprehensive guide, we’ll cover everything you need to know about making No Bake Peanut Butter Oat Cups, including:
- The best ingredients for the perfect texture and flavor
- Step-by-step instructions for foolproof results
- Variations to customize your oat cups
- Storage tips to keep them fresh
- Nutritional benefits of this wholesome treat
- Frequently asked questions
Whether you’re a busy parent, a meal prepper, or just a peanut butter lover, these No Bake Peanut Butter Oat Cups will become your new go-to dessert!
Why You’ll Love No Bake Peanut Butter Oat Cups
Before we dive into the recipe, let’s talk about why these No Bake Peanut Butter Oat Cups are so amazing:
✅ No oven required – Perfect for hot days or when you don’t want to turn on the stove.
✅ Ready in 10 minutes – Just mix, shape, and chill!
✅ Healthy ingredients – Made with peanut butter, oats, and maple syrup for a naturally sweetened treat.
✅ Kid-friendly – A great snack for lunchboxes or after-school cravings.
✅ Customizable – Swap ingredients to make them gluten-free, vegan, or nut-free.
Now, let’s get into the details!
Ingredients for No Bake Peanut Butter Oat Cups
To make the best No Bake Peanut Butter Oat Cups, you’ll need just a few simple ingredients:
Base Layer:
- 1.5 cups peanut butter – Use creamy or crunchy, but natural peanut butter works best.
- 1.5 cups oat flour – You can make your own by blending rolled oats in a food processor.
- ¼ cup maple syrup – Adds natural sweetness; honey or agave can also work.
Chocolate Topping:
- 1 cup chocolate chips – Dark, milk, or semi-sweet chocolate all work.
- 1 tsp coconut oil – Helps the chocolate melt smoothly (optional but recommended).
Optional Add-Ins & Toppings:
- Flaky sea salt – Enhances the sweet & salty flavor.
- Mini chocolate chips – For extra texture.
- Sprinkles – Fun for kids!
- Pumpkin puree (¼-⅓ cup) – For a moister texture (great for binding).
Step-by-Step Instructions for No Bake Peanut Butter Oat Cups
Making these treats is incredibly simple. Follow these steps for perfect results every time!
Step 1: Mix the Peanut Butter & Maple Syrup
- In a microwave-safe bowl, combine peanut butter and maple syrup.
- Microwave for 40-60 seconds to soften the mixture.
- Stir thoroughly until fully combined.
Step 2: Add the Oat Flour
- Gradually mix in the oat flour until a thick, moldable dough forms.
- Tip: If the mixture is too dry, add a teaspoon of extra maple syrup or peanut butter.
- For a softer texture, mix in pumpkin puree (¼-⅓ cup).
Step 3: Shape the Oat Cups
- Line a muffin pan with cupcake liners (or use a silicone muffin pan for easy removal).
- Scoop the peanut butter-oat mixture evenly into each cup.
- Press down firmly with your fingers to compact the mixture.
Step 4: Melt the Chocolate Topping
- In a microwave-safe bowl, combine chocolate chips + coconut oil.
- Microwave in 30-second intervals, stirring in between, until smooth.
Step 5: Add the Chocolate Layer
- Pour melted chocolate over each peanut butter oat cup.
- Use the back of a spoon to spread evenly.
- Optional: Sprinkle with sea salt, mini chocolate chips, or sprinkles before the chocolate sets.
Step 6: Chill & Set
- Refrigerate for 2-3 hours (or freeze for 30 minutes if in a hurry).
- Once firm, remove from the pan and enjoy!
The Health Benefits of No Bake Peanut Butter Oat Cups
When it comes to satisfying your sweet tooth without the guilt, No Bake Peanut Butter Oat Cups are a fantastic choice. Not only are they delicious, but they also come packed with nutritional benefits that make them a healthier alternative to traditional desserts. Let’s break down the key ingredients and their health perks.
1. Peanut Butter: A Protein-Packed Powerhouse
Peanut butter is the star ingredient in these no-bake cups, and for good reason. It’s rich in:
- Healthy Fats: Monounsaturated and polyunsaturated fats support heart health.
- Protein: Helps keep you full and supports muscle repair.
- Vitamins & Minerals: Contains vitamin E, magnesium, and potassium.
Pro Tip: Opt for natural peanut butter without added sugars or hydrogenated oils for the best nutritional value.
2. Oats: A Fiber-Rich Superfood
Oats are one of the healthiest grains you can eat, providing:
- Soluble Fiber (Beta-Glucan): Helps lower cholesterol and stabilize blood sugar.
- Slow-Release Energy: Keeps you full longer, preventing energy crashes.
- Antioxidants: Avenanthramides in oats have anti-inflammatory properties.
Since these cups use oat flour (simply blended oats), you get all the benefits in an easy-to-digest form.
3. Maple Syrup: A Natural Sweetener
Unlike refined sugar, pure maple syrup offers:
- Antioxidants: Helps fight oxidative stress.
- Lower Glycemic Impact: Doesn’t spike blood sugar as drastically as white sugar.
- Minerals: Contains zinc, manganese, and calcium.
For an even lower-sugar option, you can reduce the syrup or use a sugar-free substitute like monk fruit sweetener.
4. Dark Chocolate: A Heart-Healthy Topping
The chocolate layer isn’t just tasty—it’s good for you too! Dark chocolate (70% cocoa or higher) provides:
- Flavonoids: Improve blood flow and lower blood pressure.
- Iron & Magnesium: Supports energy levels and muscle function.
- Mood-Boosting Compounds: Contains serotonin precursors that may enhance mood.
By combining these ingredients, No Bake Peanut Butter Oat Cups become a nutrient-dense snack that satisfies cravings while fueling your body.
Step-by-Step Troubleshooting for Perfect No Bake Peanut Butter Oat Cups
Even though No Bake Peanut Butter Oat Cups are simple to make, sometimes things don’t go as planned. Here’s a detailed troubleshooting guide to ensure yours turn out perfect every time.
Problem 1: Mixture Is Too Dry & Crumbly
Cause: Not enough binding agents (peanut butter or syrup).
Fix:
- Add 1 tsp of maple syrup or peanut butter at a time until the mixture holds together.
- For extra moisture, mix in 1-2 tbsp of pumpkin puree or almond milk.
Problem 2: Chocolate Topping Isn’t Smooth
Cause: Chocolate may have overheated or lacked fat.
Fix:
- Always melt chocolate in 30-second intervals, stirring in between.
- Add 1 tsp coconut oil or butter for a smoother consistency.
Problem 3: Oat Cups Won’t Hold Shape
Cause: Not pressed firmly enough or too much liquid.
Fix:
- Pack the mixture tightly into the muffin liners.
- If too soft, refrigerate for 10 minutes before adding chocolate.
Problem 4: Peanut Butter Layer Is Too Sticky
Cause: Natural peanut butter can sometimes be oily.
Fix:
- Refrigerate the peanut butter before mixing to thicken it.
- Add 1-2 tbsp extra oat flour to absorb excess oil.
Problem 5: Chocolate Cracks When Biting
Cause: Chocolate hardened too quickly or was too thick.
Fix:
- Use a mix of chocolate chips + coconut oil for a more flexible texture.
- Let the cups sit at room temperature for 5 minutes before eating.
By following these fixes, you’ll get perfectly textured No Bake Peanut Butter Oat Cups every time!
Creative Variations of No Bake Peanut Butter Oat Cups
One of the best things about No Bake Peanut Butter Oat Cups is how customizable they are. Here are 5 delicious variations to keep things exciting!
1. Chocolate Peanut Butter Swirl Cups
- Swirl melted chocolate into the peanut butter-oat mixture before pressing into cups.
- Top with extra chocolate for a double-chocolate experience.
2. Almond Joy-Inspired Cups
- Mix shredded coconut into the oat layer.
- Top with dark chocolate + chopped almonds.
3. Cookie Dough Style
- Add vanilla extract + mini chocolate chips to the base.
- Use cashew butter for a sweeter, cookie-like flavor.
4. Protein-Packed Power Cups
- Stir in 1 scoop of vanilla or chocolate protein powder.
- Replace maple syrup with sugar-free syrup for a low-carb version.
5. Festive Holiday Cups
- Add cinnamon + nutmeg to the oat mixture.
- Decorate with holiday sprinkles or crushed candy canes on top.
Each variation keeps the easy, no-bake method while offering a whole new flavor experience. Which one will you try first?
Tips for the Best No Bake Peanut Butter Oat Cups
To ensure your No Bake Peanut Butter Oat Cups turn out perfectly every time, keep these tips in mind:
🔹 Use natural peanut butter – Avoid brands with added hydrogenated oils, as they can make the mixture too oily.
🔹 Grind oats finely – If making homemade oat flour, blend until powdery for the best texture.
🔹 Press mixture firmly – This prevents crumbling when biting into the cups.
🔹 Add coconut oil to chocolate – Helps it melt smoothly and set with a nice snap.
🔹 Store in the fridge – Keeps them fresh for up to 5 days (or freeze for longer storage).
Variations & Customizations
One of the best things about No Bake Peanut Butter Oat Cups is how versatile they are! Here are some delicious variations:
1. Vegan No Bake Peanut Butter Oat Cups
- Use maple syrup or agave instead of honey.
- Choose dairy-free chocolate chips.
2. Gluten-Free Option
- Ensure your oats are certified gluten-free if needed.
3. Nut-Free Version
- Swap peanut butter for sunflower seed butter.
4. Protein-Packed Boost
- Add 1-2 scoops of vanilla protein powder to the oat mixture.
5. Different Toppings
- Crushed nuts
- Shredded coconut
- Drizzled white chocolate
Storage & Shelf Life
Since these No Bake Peanut Butter Oat Cups aren’t baked, proper storage is key:
✔ Refrigerator: Store in an airtight container for up to 5 days.
✔ Freezer: Wrap individually and freeze for up to 1 month. Thaw before eating.
Note: If left at room temperature for too long, they may soften due to the peanut butter and chocolate.
Nutritional Benefits of No Bake Peanut Butter Oat Cups
Unlike store-bought desserts, these homemade treats pack some nutritional perks:
🌿 Oats – High in fiber, great for digestion.
🥜 Peanut Butter – Provides healthy fats and protein.
🍁 Maple Syrup – A natural sweetener with antioxidants.
🍫 Dark Chocolate – Contains antioxidants and may improve heart health.
Nutrition per cup (approx):
- Calories: ~180
- Carbs: 15g
- Protein: 5g
- Healthy fats: 10g
Frequently Asked Questions (FAQs)
1. Can I use quick oats instead of rolled oats?
Yes! Just blend them into a fine flour for the best texture.
2. Can I make these without a muffin pan?
Absolutely! Press the mixture into a lined baking dish and cut into squares.
3. Are these safe to eat with raw oats?
Yes! Oats are steamed before packaging, so they’re safe to eat without baking.
4. Can I use almond butter instead of peanut butter?
Definitely! Any nut or seed butter works.
5. Why did my oat cups turn out crumbly?
You may need more binding liquid (extra maple syrup or peanut butter).
No Bake Peanut Butter Oat Cups: A Delicious & Easy Treat
- Total Time: 10 minutes
Description
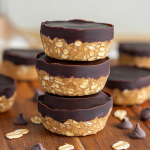
A delicious no-bake treat with a creamy peanut butter oat layer topped with rich melted chocolate. These easy-to-make cups are perfect for a quick dessert or snack, loved by both kids and adults!
Ingredients
- 1.5 cups creamy peanut butter
- 1.5 cups oat flour (rolled oats finely processed in a food processor)
- ¼ cup maple syrup (or honey)
- 1 cup chocolate chips (dark, milk, or semi-sweet)
- 1 tsp coconut oil (optional, for smoother chocolate)
Optional Toppings:
- Flaky sea salt
- Sprinkles
- Mini chocolate chips
Instructions
1. Prepare the Peanut Butter Oat Mixture
- In a microwave-safe bowl, combine peanut butter and maple syrup. Microwave for 40-60 seconds, then stir until fully combined.
- Gradually add oat flour, mixing well until a thick, moldable dough forms. (If too dry, add 1 tsp extra maple syrup or peanut butter. For a moister texture, add ¼-⅓ cup pumpkin puree.)
2. Shape the Cups
- Line a muffin tin with cupcake liners or use a silicone muffin pan for easy removal.
- Scoop the peanut butter mixture evenly into the muffin cups, pressing down firmly with your fingers.
3. Melt the Chocolate Topping
- In a microwave-safe bowl, mix chocolate chips and coconut oil. Microwave in 30-second intervals, stirring between each, until smooth.
- Pour melted chocolate over each peanut butter cup, spreading evenly with a spoon.
- (Optional) Sprinkle with flaky salt, sprinkles, or mini chocolate chips before the chocolate sets.
4. Chill & Serve
- Refrigerate for 2-3 hours until fully set.
- Gently remove from the pan and store in an airtight container in the fridge for up to 5 days.
Notes
✅ Gluten-free? Use certified gluten-free oats.
✅ Nut-free? Swap peanut butter for sunflower seed butter.
✅ Extra crunch? Mix chopped nuts into the peanut butter layer.
✅ For a sweeter touch: Drizzle with extra chocolate or caramel.
- Prep Time: 10 minutes
Nutrition
- Calories: 250 Per Serving
- Fat: 16g
- Carbohydrates: 20g
- Fiber: 3g
- Protein: 7g
Final Thoughts
These No Bake Peanut Butter Oat Cups are the ultimate easy, healthy, and delicious treat! With just 10 minutes of prep and no baking required, they’re perfect for meal prep, snacks, or dessert.