That Takeout Magic? Yeah, We’re Making It Happen In Your Kitchen Tonight!
Hey, my crispy-craving friend! Raise your hand if you’ve ever sunk your teeth into that glorious Chinese lemon chicken – crackly golden crust, juicy chicken, all drenched in that sunshine-bright sauce that dances between tangy and sweet with just the *tiniest* hint of heat. 🙋♀️ Oh, I see that hand! And let me guess… you immediately thought, “How do I make this magic happen in MY kitchen without calling for delivery?”
Well, pull up a stool, grab your favorite wooden spoon (microphone optional, but highly encouraged for kitchen karaoke), because we’re about to become sauce whisperers together. Forget complicated techniques or hard-to-find ingredients. This Chinese lemon chicken sauce? It’s pure, unadulterated weeknight joy in a saucepan. We’re talking 10 minutes, pantry staples, and a flavor payoff that’ll make you feel like you just unlocked a secret level in the game of dinner.
I used to think replicating that perfect takeout tang was some guarded culinary secret. Spoiler alert: it’s not! It’s fresh lemon juice doing a happy tango with sugar, deepened by soy sauce and warmed up by ginger, all brought together with a little cornstarch magic. It’s vibrant, it’s balanced, and it has *personality* – just like your cooking deserves. Whether you’re drizzling it over air-fryer crispy chicken (my current obsession!), tossing it with stir-fried shrimp, or even using it as a killer dip for spring rolls, this sauce is your golden ticket from “meh” Monday to “heck yes!” dinner. Ready to make your skillet sing? Let’s zest things up!
My Quest for the Perfect Zing: A Sauce Saga
Okay, confession time. My first attempt at homemade lemon chicken sauce? Total face-palm moment. Picture this: me, circa 2015, newly obsessed with ditching takeout menus. I found a recipe promising “authentic” flavor. I zested, I juiced, I stirred… only to end up with a gloopy, weirdly bitter concoction that tasted more like lemon-scented wallpaper paste than the vibrant sauce of my dreams. My then-boyfriend (bless his brave heart) took one bite, paused dramatically, and said, “Hmm… it’s… yellow?” Cue the deflated chef ego!
But here’s the thing about kitchen flops – they’re just stepping stones (sometimes sticky, messy stepping stones). That disaster became my mission. I tinkered relentlessly. Too much cornstarch? Gloopy city. Not enough fresh lemon? Sad, flat flavor. Bottled juice? Don’t even get me started on that metallic tang! The breakthrough came unexpectedly during a chaotic Friendsgiving. I was frantically whipping up a quick glaze for some baked wings and threw together lemon juice, soy, sugar, and ginger on autopilot. As it bubbled and thickened, that incredible aroma hit me – *that* was the bright, tangy-sweet scent I remembered! I ditched the complicated steps and embraced simplicity: fresh juice, balanced sweetness, umami depth, and just enough thickener for cling. The wings vanished in minutes, followed by demands for the recipe. That “happy accident” sauce? It’s the heart of this very recipe. Proof that sometimes the best flavors come from ditching the rulebook and trusting your taste buds!
Your Flavor Toolkit: Simple Stars, Big Impact
Gather these rockstars! This isn’t just a list – it’s your cheat sheet for understanding *why* each piece matters and how to swap if needed. Flexibility is your kitchen superpower!
- ⅓ cup Fresh Lemon Juice (approx. 2 large lemons): Non-negotiable vibrancy! Bottled juice lacks the bright, complex acidity of fresh. Squeeze those lemons yourself – the flavor difference is night and day. Pro tip: roll them firmly on the counter before cutting to maximize juice yield! Sub: In a true pinch? Use bottled, but expect a slightly flatter taste. Fresh is best!
- ½ cup Water: The essential diluter. It balances the intensity of the lemon and soy, creating the perfect saucy consistency without watering down flavor.
- ⅓ cup Granulated Sugar: Sweet harmony maker. It perfectly counters the lemon’s sharpness, creating that addictive sweet-tangy balance signature to the dish. Sub: Honey or maple syrup work, but they add their own distinct flavor and can make the sauce slightly darker/thicker. Adjust to taste!
- 1 tablespoon Soy Sauce: Umami depth bomb! This is the secret weapon adding savory complexity that keeps the sauce from being one-dimensionally sweet or sour. Sub: Tamari for gluten-free, or coconut aminos for a slightly sweeter, soy-free option.
- 1 teaspoon Fresh Ginger, Grated: The warm whisper. Freshly grated ginger infuses a subtle, aromatic warmth that complements the lemon beautifully. Don’t sub powdered ginger here – the flavor profile is completely different! Use a microplane for super-fine grating.
- 1 tablespoon Cornstarch: The glossy glue. This is what transforms our liquid ingredients into that luscious, cling-to-the-chicken glaze. Crucial for texture! Sub: Arrowroot powder or tapioca starch (use same amount).
- Red Pepper Flakes, to taste (start with ¼ tsp): The gentle kick. This is your dial for heat! Start small – you can always add more. It shouldn’t overpower, just provide a pleasant warmth in the background. Sub: A tiny pinch of cayenne, or a few drops of Sriracha stirred in at the end.
- Lemon Zest, optional (from 1 lemon): Zing amplifier! While optional, a teaspoon or two of finely grated zest adds intense lemon aroma and little bursts of flavor. Don’t skip if you have the lemon!
Let’s Make Sauce Magic: Step-by-Step Sizzle
Ready? Apron on? Let’s transform these simple bits into liquid gold! This is where the fun happens. I’ll walk you through each step with my favorite hacks to ensure sauce success.
- Whisk It Like You Mean It (But Gently!): “In your small saucepan, combine the lemon juice, water, sugar, soy sauce, grated ginger, and cornstarch. Here’s the critical part: WHISK until it’s absolutely smooth and there are ZERO lumps of cornstarch visible. I mean, get in there! Lumps now mean gloopy surprises later. A tiny silicone whisk is your best friend here. Chef Hack: Mix the cornstarch with just a tablespoon of the *cold* water first in a separate little bowl to make a slurry, *then* whisk it into the other ingredients in the pan. This virtually guarantees no lumps!”
- Patience is a (Delicious) Virtue: “Place the saucepan over medium heat. Now, bring it to a gentle boil. Key words: Gentle. Boil. And STIR CONSTANTLY. Don’t wander off to check your phone or water the plant! Stirring prevents scorching on the bottom and ensures even thickening. You’ll see it start to look cloudy, then suddenly, around the edges, it will begin to simmer and bubble. That’s your cue! Chef Insight: Rushing this on high heat risks burning the sugar or causing the cornstarch to clump unevenly. Medium heat is your steady, reliable buddy.”
- Spice & Sparkle Time: “Once it’s bubbling gently all over the surface, stir in your red pepper flakes and lemon zest (if using!). Keep stirring! Let it bubble away happily for a solid 2-3 minutes. This cooking time is non-negotiable – it cooks out the raw cornstarch taste and allows the sauce to thicken properly. Watch the magic happen: it will transform from thin and milky to gloriously glossy and coat the back of your spoon beautifully. Texture Check: Drag your finger across the back of the spoon. If it leaves a clean path, it’s perfect! If it runs right back, give it another 30 seconds.”
- Glossy Perfection Achieved: “Remove the pan from the heat immediately. Your sauce is done! It will continue to thicken slightly as it cools. Give it a final stir. Admire that gorgeous, translucent, sunshine-yellow gloss. Pro Tip: Taste it! This is YOUR sauce. Want more tang? A tiny squeeze of fresh lemon juice stirred in off-heat works. More heat? Sprinkle in a few more flakes. More sweetness? A tiny pinch of sugar. Adjust to your heart’s desire!”
- The Grand Finale: “Pour this liquid sunshine generously over your crispy cooked chicken (air-fryer, oven-baked, or pan-fried – all winners!), tofu, cauliflower bites, or shrimp. Toss gently to coat every nook and cranny. Alternatively, serve it warm in a little bowl as the world’s most addictive dipping sauce for egg rolls, dumplings, or even drizzle over roasted veggies! The possibilities are endless.”
Dishing Up the Sunshine: How to Serve Like a Pro
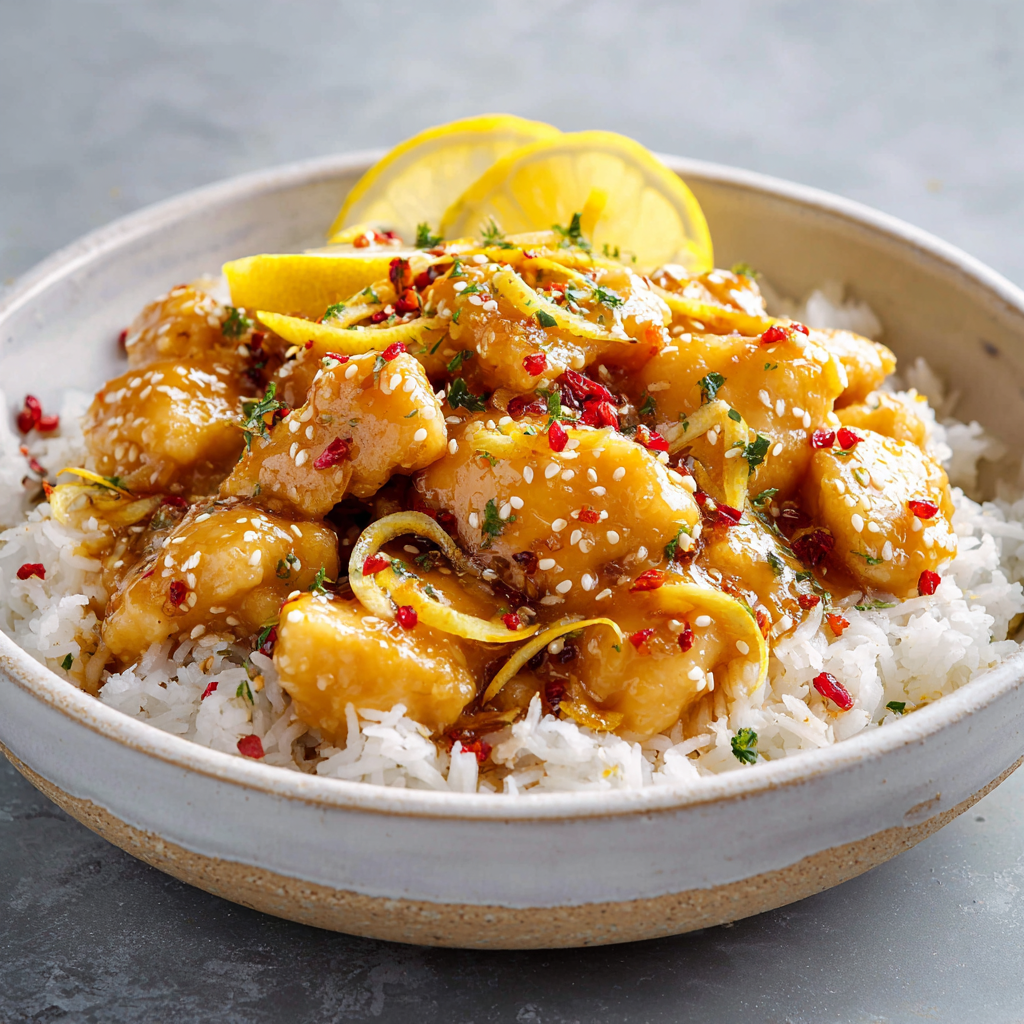
Presentation is the final flourish! Don’t just dump it – make it shine. Pile your saucy, crispy chicken high on a bed of fluffy steamed jasmine rice (it soaks up the extra sauce beautifully!). Scatter the top with vibrant green thinly sliced scallions and a sprinkle of toasted sesame seeds for nutty crunch and visual pop. For a restaurant-worthy touch, add a few very thin lemon slices or twists on the side. Feeling extra? Serve with simple steamed broccoli or snap peas for color and freshness. Remember, we eat with our eyes first! This bright, glossy sauce deserves a stage that highlights its beauty. Keep portions generous – nobody ever complained about too much lemon chicken joy!
Shake It Up! Flavor Adventures Await
This sauce is your canvas! Get creative with these easy twists:
- Honey-Lemon Ginger: Swap the sugar for an equal amount of honey. Add an extra ½ tsp of grated ginger. The honey adds floral notes and a thicker gloss – perfect for wings!
- Spicy Orange Kick: Replace half the lemon juice with fresh orange juice. Add ½ tsp orange zest and a pinch more red pepper flakes (or a dash of Chinese chili paste like Sambal Oelek) for a vibrant, fiery twist.
- Garlic Lover’s Dream: Sauté 1-2 finely minced garlic cloves in a tiny bit of oil in the saucepan *before* adding the other ingredients. Proceed as directed. Garlic + lemon = heaven!
- Gluten-Free & Soy-Free: Use Tamari or Coconut Aminos instead of soy sauce. Ensure your cornstarch is GF (most are). Easy peasy!
- Veggie Power: Skip the chicken! Toss the sauce with crispy fried or baked tofu cubes, cauliflower florets, or even roasted sweet potato chunks.
Harper’s Kitchen Confidential: Extra Nuggets of Wisdom
This little sauce has come a LONG way from my gloopy disaster! Over the years, I’ve learned its quirks. First, freshness is king. Using older lemons? The juice yield and flavor plummet. Buy plump, heavy lemons with bright yellow skin. Second, don’t fear the reheat! This sauce stores beautifully. Let it cool completely, then pop it in an airtight container in the fridge for up to 5 days. Reheat gently in a saucepan over low heat, whisking in a tiny splash of water or lemon juice if it thickens too much. Microwaving works too, but do it in short bursts and stir well to avoid hotspots.
One funny fail I remember: I once doubled the recipe in a tiny saucepan. Big mistake! It bubbled over like a citrus volcano, coating my stovetop in sticky yellow lava. Lesson learned? Use a slightly larger pan than you think you need, especially when doubling. The sauce needs room to bubble and thicken without escaping! Now, I always give it space. This recipe is truly forgiving and adaptable – that’s why I adore it. It’s proof that big, bold flavor doesn’t need complexity. Now go forth and sauce confidently, my friend!
Your Sauce SOS: Fixes for Common Hiccups
Got a sauce question? I’ve probably been there! Let’s troubleshoot:
Q: My sauce turned out too thick! Help! It’s like lemon-flavored paste.
A: Don’t panic! Over-thickening usually means it simmered too long or had a smidge too much cornstarch. Fix: Whisk in warm water or lemon juice, just a teaspoon at a time, over low heat until it reaches your desired consistency. Start small – you can always add more liquid!
Q: Why does my sauce taste bitter? I used fresh lemons!
A: Bitterness usually comes from the white pith (the layer under the yellow zest). When zesting, avoid grating down into the white part. Also, if you simmer the zest *too* long, bitterness can develop. If it’s bitter, try whisking in a tiny pinch of sugar or honey to balance it. Next time, add the zest right at the end of cooking (step 3) for maximum flavor without bitterness.
Q: The sauce is too thin/runny, even after cooking for 3 minutes. What happened?
A: This usually means the cornstarch didn’t activate fully. Possible culprits: 1) The mixture didn’t reach a full, bubbling boil. Ensure it’s bubbling across the entire surface, not just the edges. 2) You added the cornstarch directly to hot liquid without making a slurry first, causing clumps that didn’t dissolve properly. Fix: Mix ½ tsp cornstarch with 1 tbsp COLD water to make a smooth slurry. Whisk this into the thin sauce and bring back to a gentle boil for 1-2 minutes.
Chinese Lemon Chicken Sauce
- Total Time: 10 min
Description
That glossy, tangy-sweet lemon chicken you can’t stop ordering? You’re making it tonight. This weeknight wizard of a sauce brings the takeout magic home with zero mystery ingredients and all the bold flavor you crave – bright lemon, warm ginger, savory umami, and just the tiniest kick of heat. Drizzle it over crispy chicken, tofu, shrimp, or veggies and let your kitchen feel like your favorite Chinese spot (minus the delivery fee). It’s vibrant, fast, and endlessly versatile – let’s make your dinner sing!
Ingredients
-
⅓ cup fresh lemon juice (about 2 large lemons)
-
½ cup water
-
⅓ cup granulated sugar
-
1 tbsp soy sauce (or tamari for gluten-free)
-
1 tsp freshly grated ginger
-
1 tbsp cornstarch
-
¼ tsp red pepper flakes (optional)
-
Zest of 1 lemon (optional but recommended)
Instructions
-
Mix the base: In a saucepan, whisk together lemon juice, water, sugar, soy sauce, ginger, and cornstarch until smooth (no lumps!).
-
Heat gently: Bring to a gentle boil over medium heat, stirring constantly. Let it bubble for 2–3 minutes until thickened and glossy.
-
Add heat & zing: Stir in red pepper flakes and lemon zest. Cook for 1 more minute, then remove from heat.
-
Adjust to taste: Want more sweetness or tang? Add a touch of sugar or lemon juice as needed.
Notes
-
Whisk cornstarch with a bit of cold water first for lump-free magic.
-
Add zest at the end for pure lemon aroma – no bitterness!
-
Use a large pan if doubling – lemon lava eruptions are real.
- Prep Time: 5 mins
- Cook Time: 5 mins
Nutrition
- Calories: 45 kcal per serving
- Sugar: 9g
- Sodium: 200mg
- Carbohydrates: 11g
Final Thoughts: Sauce Confidence = Kitchen Freedom
The beauty of this lemon chicken sauce isn’t just its flavor—it’s the confidence it gives you to play with balance, adjust to your taste, and repurpose it in countless ways. Whether you’re a takeout nostalgist, a veggie lover, or a sauce experimenter, this recipe is your gateway to bolder, brighter cooking.